Organizations that use Aircall, a leading cloud-based phone platform for seamlessly managing customer interactions, would carry out better analytics by moving their data to a centralized location. This is where a cloud-based data warehouse like Snowflake can come to the rescue.
Loading data from Aircall to Snowflake allows you to organize, manage, and analyze your data effectively. As a result, it enhances decision-making and provides opportunities to improve customer experience.
This post provides an overview of both platforms and walks you through the methods to load data from Aircall to Snowflake.
Aircall Overview
Aircall is a cloud-based phone system structured to suit modern business requirements. It utilizes Voice over Internet Protocol (VoIP), enabling you to make and receive calls from anywhere. This feature gives Aircall a competitive advantage over traditional phone lines by offering flexibility, scalability, and cost efficiency.
Aircall operates on multiple data centers spread across different geographic regions worldwide, thereby ensuring high availability and reliability. It also offers you features like voicemail and call routing. These help enhance the user experience and streamline the entire communication process.
Some of Aircall's key features are listed below.
- Integration Capabilities: Aircall integrates with popular helpdesk platforms like Freshdesk and Intercom. It also seamlessly integrates with CRM platforms like Salesforce and HubSpot. This facilitates automatic call logging, proper data synchronization, and personalization, thereby enhancing its efficiency.
- Call Conferencing: Aircall offers call conferencing functionality, allowing multiple users to join a single call to implement team meetings, collaboration, and consultations.
- Call Queuing: Aircall supports call queuing functionality by placing all the incoming calls in a queue during the busy phases. It effectively handles all the calls by connecting to the next available caller in the queue, thereby reducing the waiting time.
Introduction to Snowflake
Snowflake is a cloud-based data warehousing platform for storing, organizing, managing, and analyzing data. It offers complete cloud operational efficiency compared to traditional data warehouse platforms by enhancing flexibility, scalability, and cost efficiency.
Snowflake supports both structured and semi-structured data, such as JSON and XML. This functionality allows you to handle diverse data types seamlessly. It operates on the shared data architecture, also known as the multi-cluster architecture. This optimizes resource utilization, enhancing productivity, particularly with large and growing datasets.
Some of Snowflake's key features are listed below.
- Automatic Schema Resizing: Snowflake offers an automatic schema resizing feature that allows you to make schema changes. It enables you to add columns, change data types, or modify entire tables without causing any disruption or downtime in the application.
- External Functions: Snowflake allows you to execute custom code and functions written in languages such as Java, JavaScript, or Python. This helps streamline your data management and process all tasks effectively.
- Zero-Copy Cloning: Snowflake offers zero-copy cloning of the required datasets. This allows you to create copies of your data for development or testing purposes without incurring additional storage costs for the replicated data.
Loading Data From Aircall to Snowflake: Why Should You Transfer Your Data?
- Centralized Data Repository: You can centralize data in a single location by loading your data from Aircall to Snowflake. This helps simplify data management and facilitates easy access and analysis of your data, resulting in improved decision-making.
- Scalability: Snowflake offers a highly scalable architecture to handle large volumes of data effectively. This scalability enables you to scale up or down as per your requirement and efficiently handle workloads, ensuring smooth data operations for growing datasets.
- Cost Effective: Snowflake offers the pay-as-you-go pricing model, ensuring cost efficiency in managing Aircall’s data. You only have to pay for the services and storage that you use, eliminating the need for upfront investments in infrastructure.
How to Load Data From Aircall to Snowflake
You can use the following ways to load data from Aircall to Snowflake:
- The Automated Way: Using Estuary Flow for Aircall to Snowflake integration
- The Manual Approach: Loading data from Aircall to Snowflake using CSV Export/Import
The Automated Way: Using Estuary Flow to Load the Data From Aircall to Snowflake
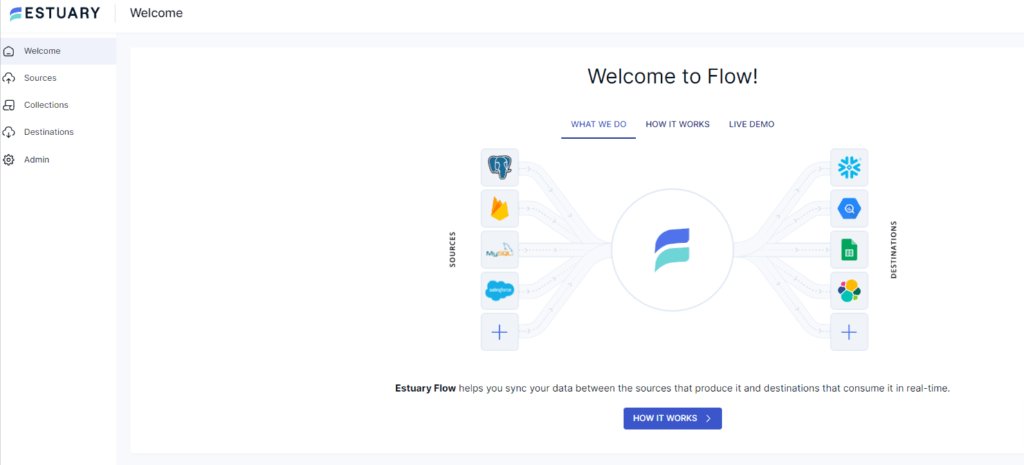
Estuary Flow revolutionizes your data-loading process by offering a no-code, user-friendly, real-time ETL (extract, transform, load) platform. It is suitable for all users looking for a fully-managed, scalable solution to set up real-time pipelines — even for those with non-technical backgrounds as it does not require any prior coding experience.
Let’s explore the step-by-step implementation of loading your data from Aircall to Snowflake using Estuary Flow.
Prerequisites
- An active Aircall access token
- Snowflake
- An Estuary account
Step 1: Configuring Aircall as the Source
- Log in to your Estuary Flow account to start configuring Aircall as the data source.
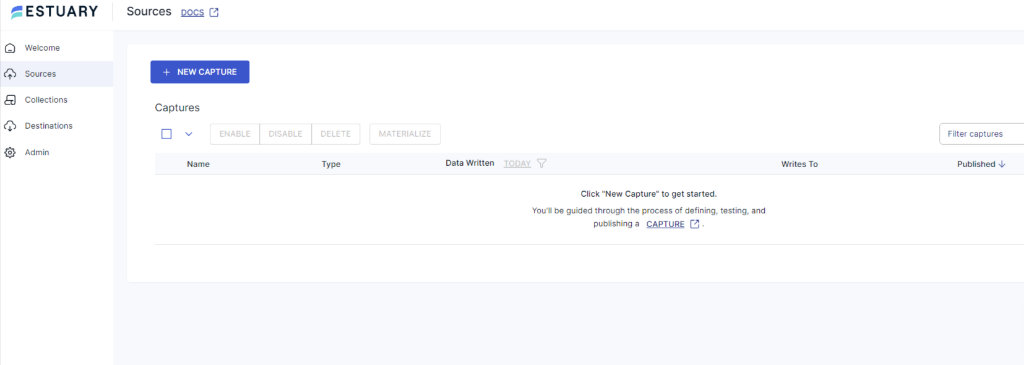
- Go to the Sources tab on the dashboard.
- Click on the + NEW CAPTURE button on the Sources page.
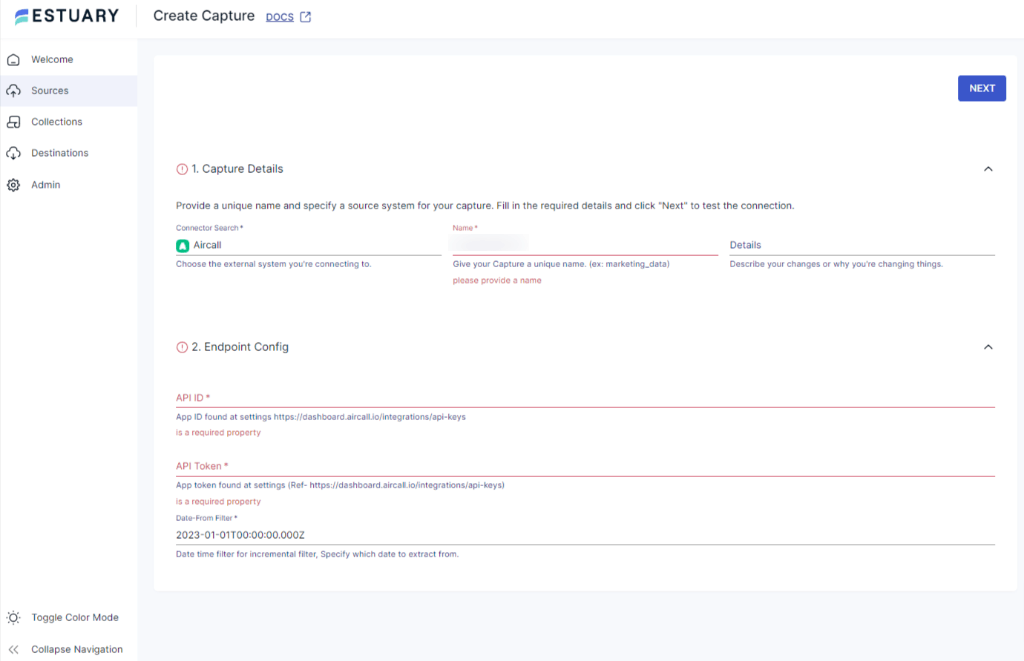
- Using the Search connectors field, search for the Aircall connector and click on its Capture button.
- You will be redirected to the Aircall connector page. Enter the required information in the mandatory fields, such as Name, API ID, and API Token.
- Click on NEXT > SAVE AND PUBLISH. The connector will capture data from Aircall into Flow collections.
Step 2: Configuring Snowflake as the Destination
- To start configuring Snowflake as the destination, go to the Destinations tab on the dashboard.
- Click on the + NEW MATERIALIZATION button on the Destinations page.
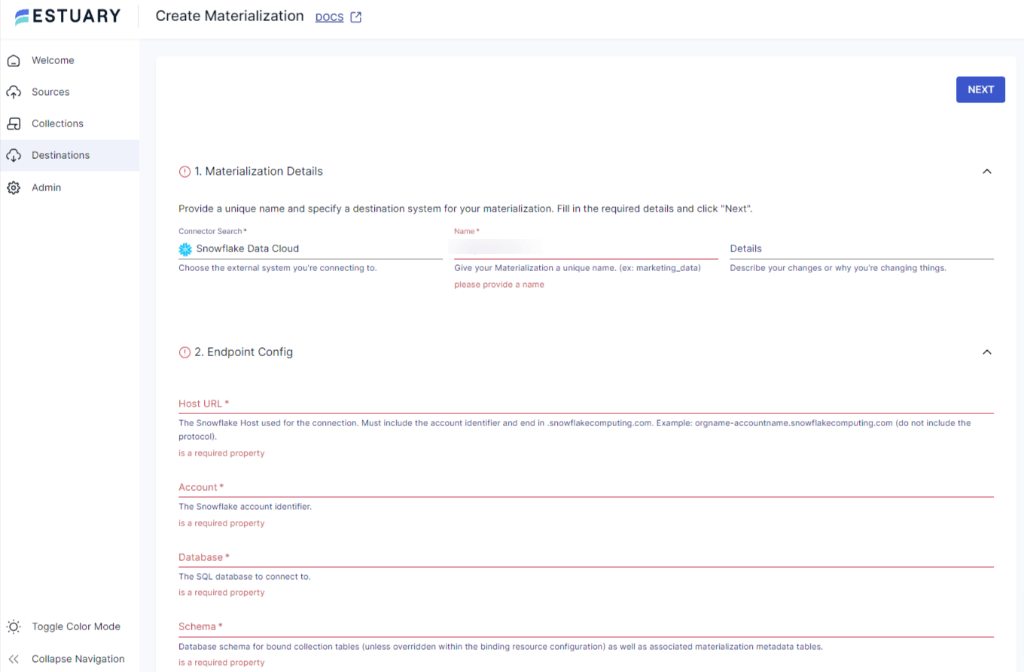
- Using the Search connectors box, search for the Snowflake connector and click on its Materialization button.
- You will be redirected to the Snowflake connector page. Fill in all the mandatory fields, such as Host URL, Account, Database, Schema, User, and Password.
- You can select a capture to link to your materialization in the Source Collections section.
- Then, click on NEXT > SAVE AND PUBLISH. This will materialize the data from Flow collections into tables in a Snowflake database.
Benefits of Using Estuary Flow
- Scalability: Estuary Flow is scalable horizontally, providing you the flexibility to scale up or down instantly according to your requirements. This enables you to handle varying volumes of growing datasets.
- Change Data Capture: Flow supports CDC (Change Data Capture) capabilities to process your data in real time. This helps maintain data integrity and ensures that your destination data is updated as soon as it detects any change at the source end.
- Built-in connectors: Flow offers more than 150 ready-to-use connectors for creating custom data pipelines to streamline your data loading process. The connectors include the majority of data warehouses, data lakes, popular databases, and SaaS platforms.
The Manual Approach: Using CSV Export/Import to Load Data from Aircall to Snowflake
This method facilitates loading data from Aircall to Snowflake by exporting the Aircall data in CSV files and then importing CSV into Snowflake.
Step 1: Exporting Data from Aircall as CSV
- Log in to your Aircall account.
- Navigate to the Overview dashboard in the left navigation pane inside the Stats section. Now, click the Download button on the top right corner.
- On the dashboard filters, adjust the data shown to the required granularity.
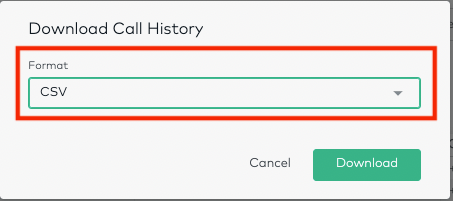
- There are two data formats available for this export.
- PDF export
- CSV export
- Select the CSV option to download your data. Your browser will start the download, and you will get a zip file containing separate CSV files for all the titles shown on the Overview Dashboard.
Step 2: Importing the CSV into Snowflake
- Log in to your existing Snowsight account.
- Select the particular database in which you want to import your data. Go to the navigation menu and select Data > Databases. This will display all the available databases.
- Select the desired database and schema to set the context of your data loading.
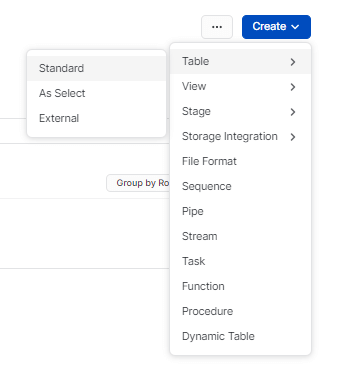
- Select the existing table or create a new table using the interface.
- Start writing your query to create the table. Here is an example query of creating a table for students record.
plaintextcreate or replace TABLE MY_DATABASE.MY_SCHEMA.CSV_LOAD_DEMO (
  student_id INTEGER,
  first_name VARCHAR(50),
  last_name VARCHAR(50),
  date_of_birth DATE,
  email VARCHAR(100),
  address VARCHAR(200)
);- Navigate to the table where you have to load your data.
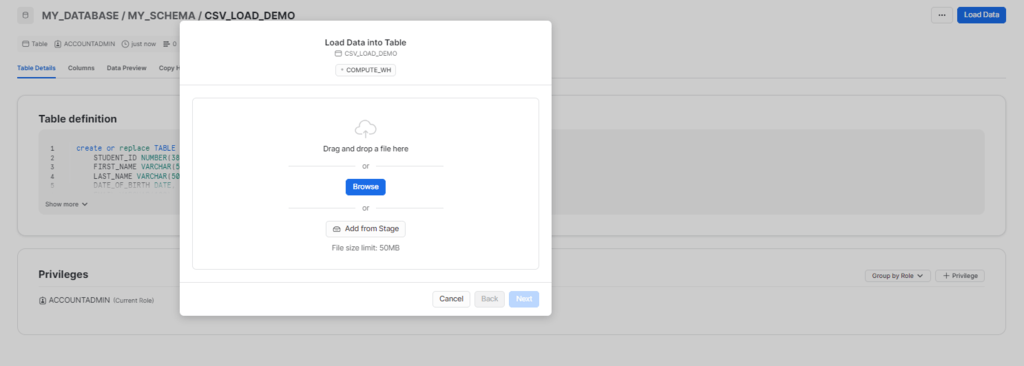
- Click on the Load Data option to begin the data-loading process for the selected table.
- From the Load data into Table dialog box, choose the Upload a File option to upload structured or semi-structured data files.
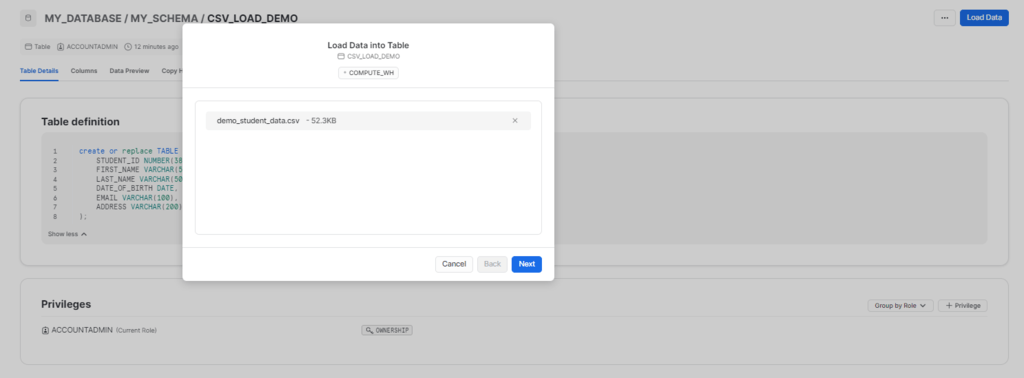
- Use the drag-and-drop feature or file selection dialog box to upload your data files.
- Set a default warehouse or select from the available options and click Next.
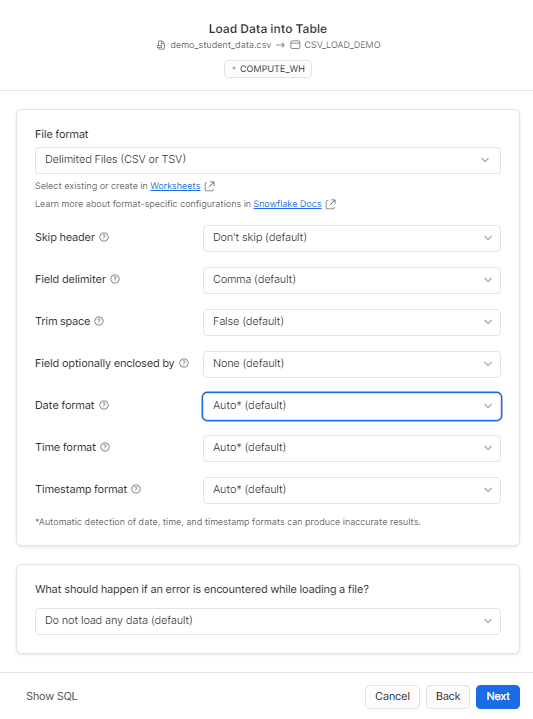
- Customize a file type to set an appropriate file format or select a predefined file format for your data. Click on the Next button to proceed.
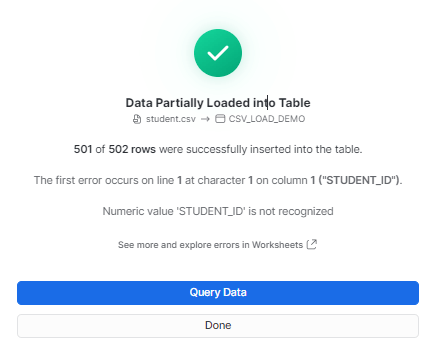
- Snowsight will start loading the file and display the number of rows successfully inserted into the table.
- After the data loading is complete, you can follow any of these two ways:
- Select Query Data to open a worksheet with SQL syntax for querying your table.
- Click on Done to close the dialog box and complete the process of loading data.
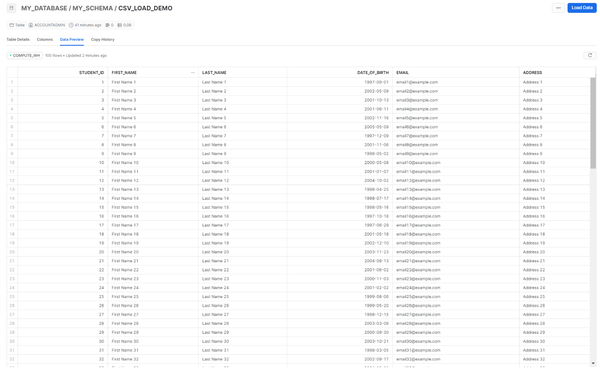
- Your CSV file will be successfully imported into Snowflake.
Get Integrated
Loading the data from Aircall to Snowflake ensures that your data is maintained in a centralized repository. There are two methods for loading data from Aircall to Snowflake. One is the CSV export/import method, which requires you to manually export your data from Aircall to CSV and then import this data into Snowflake. This method is time-consuming, susceptible to errors, and does not allow real-time synchronization of data.
Another option is to use a reliable data integration platform like Estuary Flow to load your data from Aircall to Snowflake, which allows you to automate the entire process. It eliminates the requirement for extensive technical expertise and offers a variety of connectors, CDC capabilities, and impressive scalability.
Eliminate your data integration hassles by automating the process using Estuary Flow. Register for your free account and get started right away!


