Introduction
If you’re trying to move data from Postgres to Snowflake, you’re probably using Snowflake as a data warehouse. You could load data from Postgres to Snowflake manually the first time or for an ad hoc report. it’s not recommended. The best, and most common approach is to automate the process as part of a data pipeline.
If you’re trying to connect Postgres to Snowflake quickly, you’ve come to the right place. This article will walk through the steps needed to connect Postgres to Snowflake in 30 minutes or less.
Choosing Between Real-Time Streaming and Batch Processing
One of the first, and most important decisions you need to make when you move data from Postgres to Snowflake is whether to do real-time or batch processing. The choice between batch or streaming depends on your specific requirements and priorities.
With Postgres, the fastest, most efficient, and most reliable way to extract data is using real-time change data capture (CDC). But there are several reasons you may end up using batch instead.
Batch processing is often acceptable for analytics, even if real-time streaming is more efficient and reliable. A lot of analytics does not need real-time data. Many reports are viewed daily, sometimes hourly, for historical analytics. Batch can also cost less. For example, it costs more to load Snowflake in near real time because you need to keep an additional Snowflake instance running, or use Snowpipe streaming.
You’ll need to decide between batch processing and streaming. Make sure you look forward to future projects before deciding on your approach. The best approach is to choose a vendor or open source technology that will allow you to go real-time, or at least lower batch intervals as needed, and effectively manage the data transfer process in Snowflake.
Data Pipeline for Postgres to Snowflake Migration: Build vs Buy
You can choose to build your own data pipeline. With batch, there are options like Apache Airflow for orchestrating batch jobs. Airflow is proven to work and scale, but it requires Airflow experts, time, and money. You can also build your own streaming data pipeline using messaging software such as Kafka, and Debezium. But like Airflow, this requires investing in a team and infrastructure.
The majority of companies don’t have the experts, infrastructure resources, or appetite to build their own data pipelines. For this reason, the majority of Snowflake customers rely on ELT/ETL vendors to connect Postgres to Snowflake.
Data integration tools play a crucial role in connecting databases like Postgres to Snowflake, in part because they make it easy to set up connectors to sources and destinations, and because they sync data automatically. Pricing, especially usage-based pricing based on rows of data or another metric, can lead to high costs, so make sure you understand your costs before you buy.
The most common vendor choice for a batch data pipeline is an ELT vendor, since they all support batch. Many ELT vendors implement CDC from Postgres to Snowflake using micro-batch because they can only support batch. Many companies can’t get access to the database to use CDC for security reasons. In addition, batch may be the only way to extract data from legacy or other source systems. Before you choose a vendor, make sure you will be able to get access to your CDC sources.
If you need real-time data for analytics, or plan to use Postgres change data capture (CDC), you can also start to look at those few vendors that support streaming as well, such as Estuary. Streaming data pipelines are also used for operational analytics - including IT or operational support, troubleshooting or monitoring use cases - all of which require up-to-date data.
ELT vs ETL: Which Data Integration Approach is Right for You?
Most data integration vendors either support ELT (Extract, Load, Transform) or ETL (Extract, Transform, Load). While ETL is actually older, more Snowflake customers use batch ELT than ETL. Most ELT vendors replicate from Postgres to Snowflake in batch intervals (not real-time), and then integrate with dbt to run transforms inside Snowflake.
There are several cases where using ETL, and running transforms outside of the data warehouse makes more sense. You can achieve lower latency with streaming transforms. ETL is less work if you need to run the same transform for multiple destinations. And some destinations don’t support ELT using SQL or dbt.
PostgreSQL: A Quick Overview
PostgreSQL is an open-source object-relational database management system (RDBMS). Originally called POSTGRES as the successor to Ingres, it became PostgreSQL to emphasize its focus on SQL. People love open source Postgres because it’s proven, has an extensive feature set, and is very extensible. In addition to the core open source Postgres, you’ll find over 30 variants of Postgres including Amazon Redshift.
Why do people love Postgres?
- Data support: It supports several built-in data types such as a character, date and time, numeric, boolean, JSON, and more.
- Extensibility: With Postgres, you can change just about anything from functions, aggregates, and data types to core modules. There are plenty of options you can choose.
- Full Text Search: It provides strong support for full-text search, allowing users to conduct intricate text searches and sort results according to relevancy.
- Multimaster replication: there are good open source options for replication, and several options for multi-master replication, though you’ll need to switch to a commercially supported version of Postgres.
- Multiversion concurrency control (MVCC): Postgres implemented full MVCC to help reduce locking contention and help with scalability.
- Query optimizer: Postgres is better than most in optimizing queries so that you don’t have to spend time re-writing queries manually.
- Security: PostgreSQL provides strong security features, including user roles and privileges, SSL certificates, and encryption choices to protect the confidentiality and integrity of data.
- Superior Indexing: Numerous indexing techniques, such as B-tree, hash, GIN (Generalised Inverted Index), and GiST (Generalized Search Tree), are available in PostgreSQL, enabling effective data retrieval and query optimization.
A pre-built connector to PostgreSQL makes replication, transformation, and data migration from Postgres to Snowflake easier. The best connectors take care of most aspects of the data migration, from translating schema, to the removal of duplicate records, to data type mapping for loading into Snowflake.
Snowflake: A Quick Overview
Snowflake is one of the most popular cloud data warehouses. Founded in 2012, it was one of the first cloud data warehouses with decoupled storage and compute, and consumption-based pricing. This revolutionized data warehousing because it allowed companies to start small with new data warehouse projects. Since then, Snowflake has evolved into a broader cloud data platform that supports other compute workloads for analytics, data science, machine learning, and AI. It is the only major cloud data warehouse that is independent of, and can be hosted on Microsoft Azure, Amazon Web Services, and Google Cloud Platform.
Snowflake's architecture is structured into three decoupled multi-tenant layers that scale independently—database storage, query processing, and cloud services.
- Database storage is a proprietary columnar storage format for tables, with each table composed of micro-partitions between 50-150MB in size. Each time you write anything to Snowflake, you’re rewriting an entire micro-partition. This makes Snowflake more suited for (micro-) batch than real-time. It’s one reason why most writes happen in 1+ minute intervals. But Snowflake is becoming more real-time.
- Data type support. Snowflake supports a rich set of data types, including semi-structured data types like JSON and XML, which is important for loading data directly into Snowflake and for supporting different types of analytics and machine learning.
- Compute (query processing) consists of virtual data warehouses, compute clusters that range from x-small (1 credit/hour, 8 VCPUs) to 6-xlarge (512 credit/hour, 4096 VCPUs). They are dedicated, independent compute clusters that load data from storage into local “cache” as needed by its consumers. This reduces the data size, making compute faster and more efficient. There are also Snowpark-optimized warehouses for general-purpose compute. Compute is kept “warm” in a shared pool for fast startup.
- Cloud services are all the control services you need to support storage and compute, including security, metadata, and infrastructure management.
Why Move Data from Postgres to Snowflake Data Warehouse?
Snowflake has been an innovator in the market with several key features that make companies choose to adopt Snowflake.
- Scalability: Snowflake has true elastic scale. You can quickly move from one to another size cluster with a click. Snowflake allows you to automatically scale up and down additional instances of the same size warehouse (multi-cluster warehouses.)
- Data sharing: Snowflake's innovative data-sharing capabilities help in sharing live, up-to-date data in a secure and efficient manner with internal and external people.
- Zero-copy cloning: Snowflake's zero-copy cloning feature helps to create, test, and deploy data without impacting your storage or performance. It makes it easier to develop and test new features, run experiments, or troubleshoot issues.
- Ecosystem support: Snowflake's large number of integrations and compatibility help connect with various popular BI, ETL, and data visualization tools. Its cloud architecture effortlessly integrates with any of your preferred cloud providers, be it Azure, AWS, or GCS.
- Virtual private cloud: Snowflake does not let you run on your own on premises or cloud infrastructure. But you can run Virtual Private Snowflake in a separate dedicated Snowflake account that accomplishes the same goal. With Virtual Private Snowflake you have your own dedicated pool to ensure fast scaling.
- Time travel: Snowflake not only archives data. It allows you to view and modify historical data for up to 90 days.
Snowflake has helped redefine data management and how a data warehouse can be used as more of a data lake by allowing companies to store unlimited amounts of raw data without having to spend on compute. It allowed companies to implement modern data engineering best practices, to extract and load raw data directly into Snowflake as a modern data cloud platform, and then transform data as needed not just for analytics, but for other workloads as well including machine learning and AI.
Methods to Load Data from Postgres to Snowflake
You have a few options to move data from Postgres to Snowflake, from completely manual approaches or scripts to using pre-built connectors and data integration products.
Given that we are talking about Snowflake, we will not include the manual methods because data warehouse deployments should be supported with modern data engineering pipelines.
- Method 1: Use Apache Airflow for batch orchestration.
- Method 2: Using Estuary Flow
Method 1: Migrate PostgreSQL to Snowflake Using Apache Airflow
If you decide to use Apache Airflow to migrate data from Postgres to Snowflake, you will need to set up and maintain your own Apache Airflow deployment. There are several articles with instructions on how to connect Snowflake to Postres once you’re all set up, like this Medium article.
Step 1: Set up Airflow
Assuming you already have a Postgres database set up, if you’re using Linux you can follow this article for setting up Airflow.
You will also need to install your Airflow packages on your client.
Step 2: Set up your Airflow Postgres and Snowflake connectors
From there you will have to configure the connectors to Postgres and Snowflake. While this can take a little time, Airflow does make it easier.
Step 3: Define your Airflow DAG
Next you’ll need to write your DAG (Directed Acyclic Graph) as a Python script. Airflow uses DAGs to define orchestrations. It means you need to be familiar with Python and the AIrflow syntax for DAGs.
Step 4: Run and monitor your Airflow DAG
Once you start the Airflow scheduler and Web server, you can log in, find the specific DAG, and start it. You can then start to monitor its progress.
Summary: Airflow Benefits and Challenges
Airflow is one of the most mature open source tools you can use for building your own batch data pipelines. It has been proven to work even in some of the largest environments.
But there are still some major challenges that make the majority of companies choose other options.
The first challenge is that you need a team of Airflow experts to install and manage Airflow, and developers to code your pipelines in Python. The more sources and destinations, the more complex your DAGs can become to develop, manage, monitor, and scale.
The second challenge is that Airflow is open source. Like most open source tools, there are commercially available options, like Astronomer.
The third challenge is that Airflow is batch only. If you need real-time data movement, you’ll need to use something else for your real-time data movement, and you’ll end up with two different technologies.
Method 2: Move Data from Postgres to Snowflake Using Estuary Flow
Estuary Flow Overview
Estuary Flow is the first platform built from the ground up to deliver the most real-time and reliable change data capture (CDC), streaming, and batch data using a single data pipeline for analytics, operations, and AI.
Key features of Estuary Flow include:
- The fastest CDC and real-time capture with sub-100ms end-to-end latency.
- The most reliable capture with transactionally guaranteed exactly-once delivery.
- The only stream-store-replay that immediately stores streams in flight as a durable transaction log for later replay such as backfilling, stream processing, or time travel.
- Flexibility to mix real-time with any-speed batch in the same pipeline.
- DataOps support via CLI and API, along with built-in schema evolution.
- Choice of replication that writes in-place or saves entire change history.
- True elastic scale, like Snowflake, that scales horizontally and can support bursting for use cases like data backfilling.
This guide will walk you through the steps to create a pipeline using Estuary that efficiently moves data from a PostgreSQL database to a Snowflake data warehouse.
- Step 1: Create an account with Estuary Flow
- Step 2: Configure an AWS RDS for the Postgres instance
- Step 3: Set up Postgres Client Locally to Complete Postgres Setup
- Step 4: Create a table and load it
- Step 5: Set up Snowflake
- Step 6: Create a Capture
- Step 7: Create a Snowflake Materialization
- Step 8: Confirm the Data in Snowflake is Accurate
Explore each step in detail to efficiently set up your data pipeline from PostgreSQL to Snowflake. Let's dive in!
Prerequisites
- An Estuary Flow account
- A Postgres database
- A Snowflake account
Step 1: Create an Estuary Flow account
Let’s get started! If you have any questions about this tutorial at any time you can talk to us on Slack.
First, to get started with Estuary Flow, create a free account in the web app.
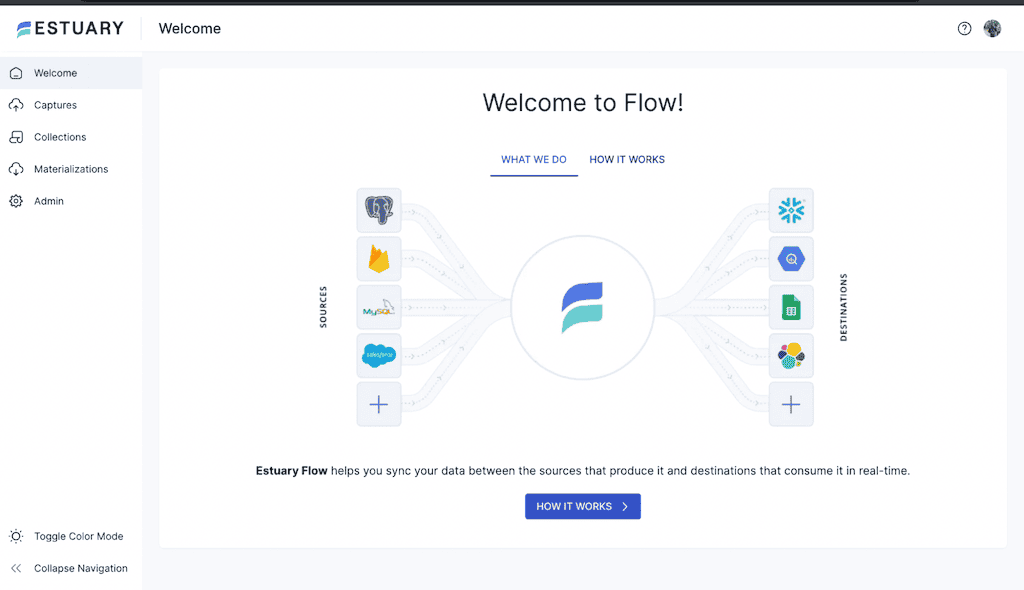
You can either sign up with your Github or Google mail account. After logging in, you will see a welcome page.
Congratulations!! You have successfully created an Estuary Flow account and you can start to build your data pipeline from Postgres to Snowflake.
For this tutorial, Steps 2-5 will help you set up your own Postgres and Snowflake instances. If you were doing an actual integration, you would jump to step 6. All the work in Estuary will only take you a few minutes.
Step 2: Configure an AWS RDS for the Postgres instance
The next step is to prepare your Postgres database and set the right permissions to allow for change data capture.
In case you don’t want to use your production instance, you can use Amazon RDS to host a sample Postgres database in the cloud. Apart from Amazon RDS you could also make use of Google Cloud SQL, Azure Database, Amazon Aurora, and so many others.
To create an Amazon RDS instance, you will need an AWS account. After login, search for Amazon RDS on your search bar.
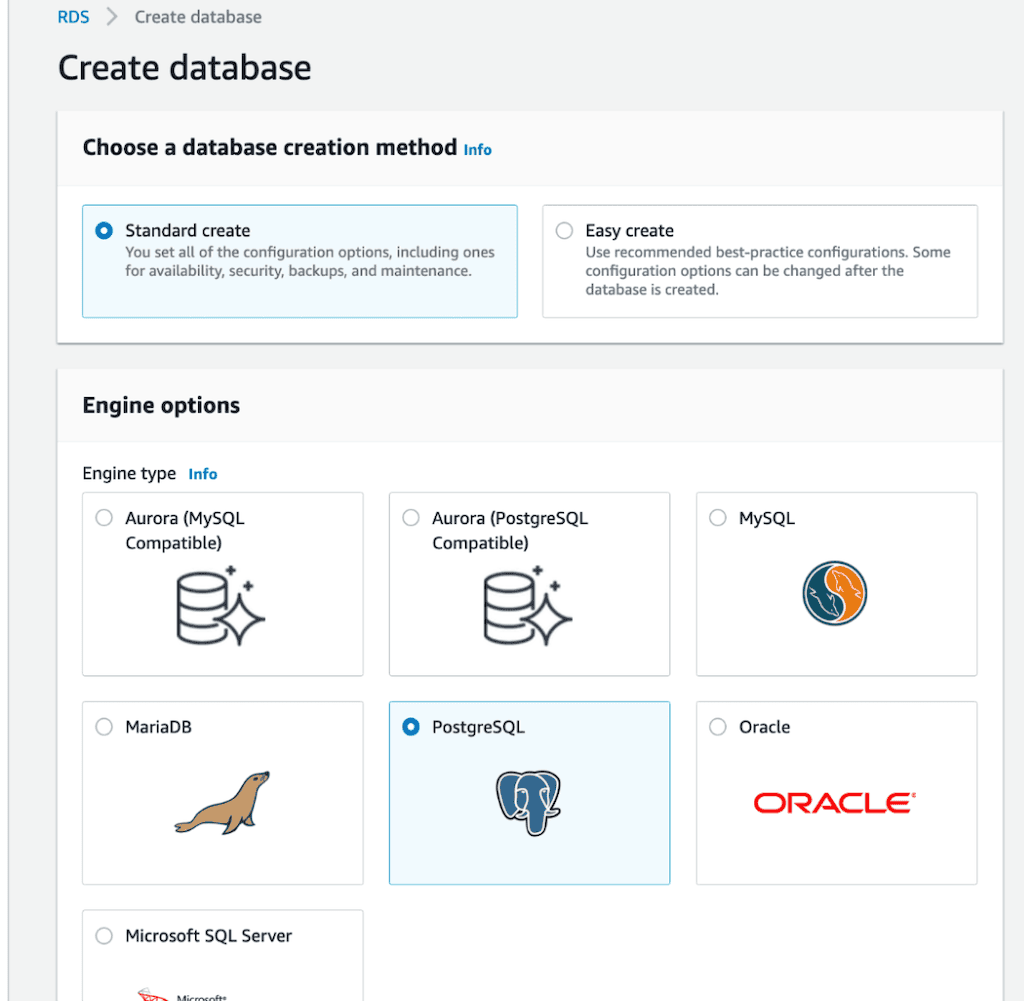
You then go to Databases > Create database.
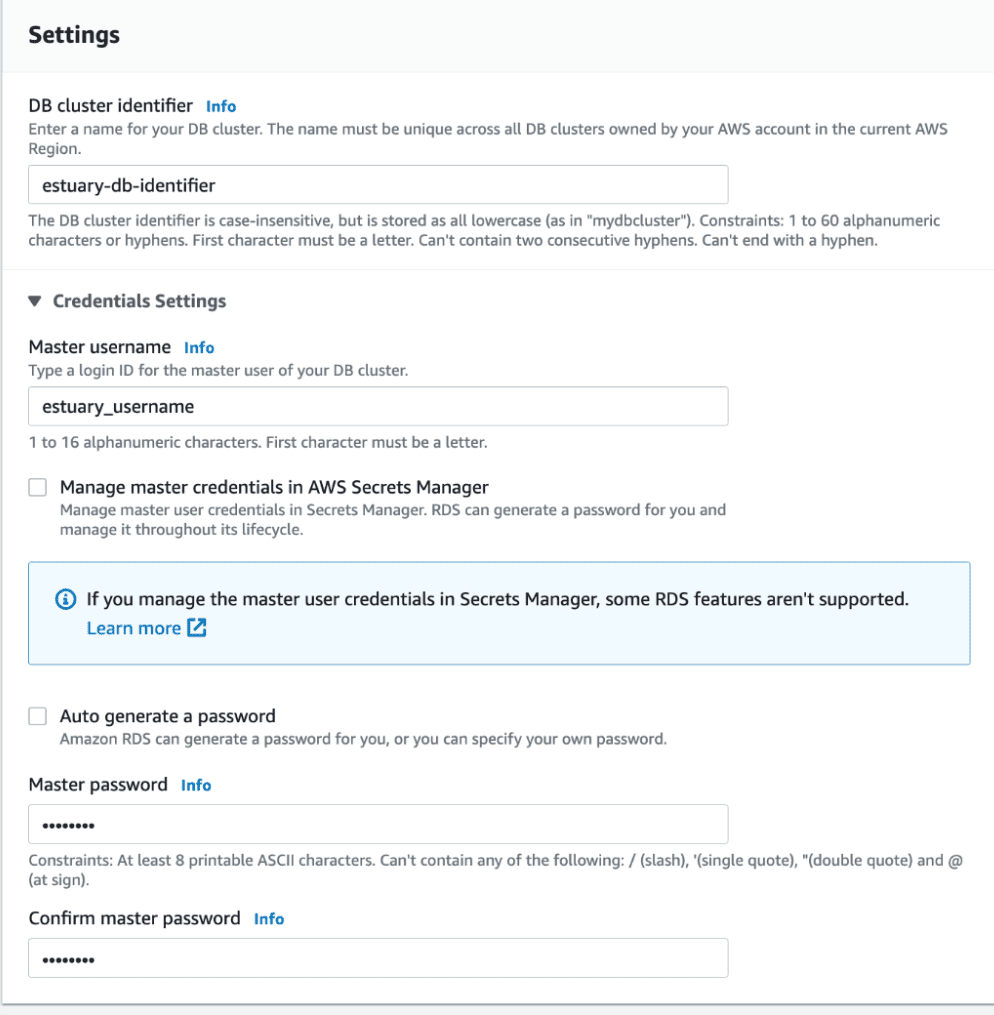
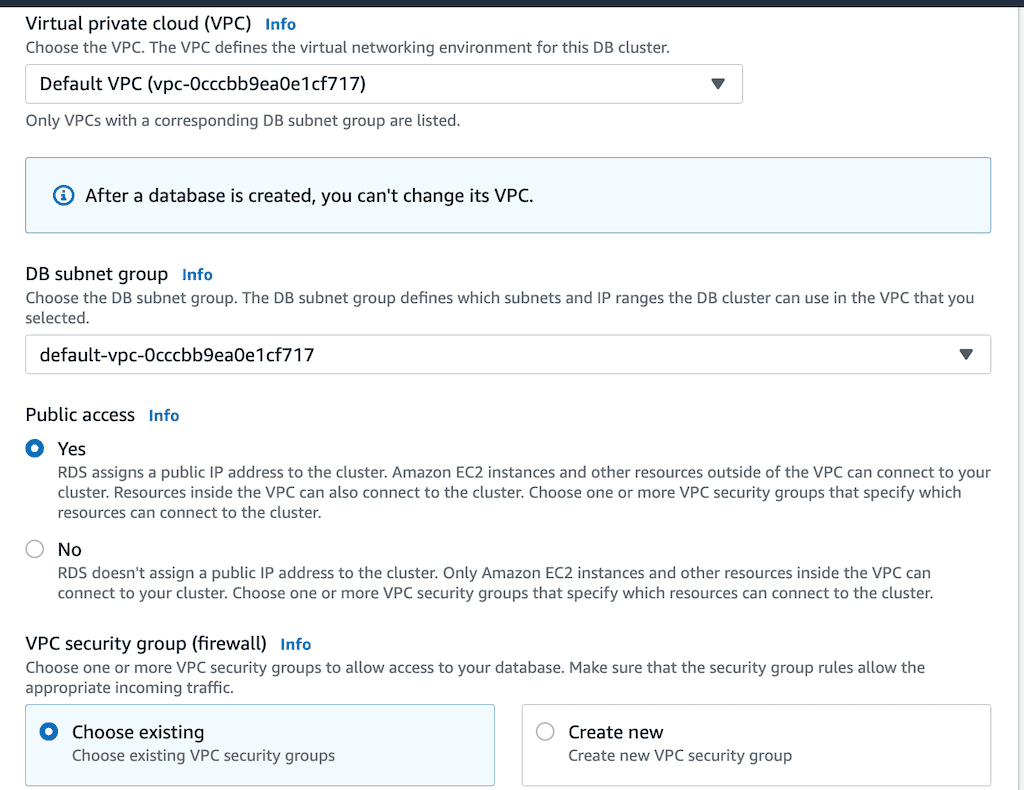
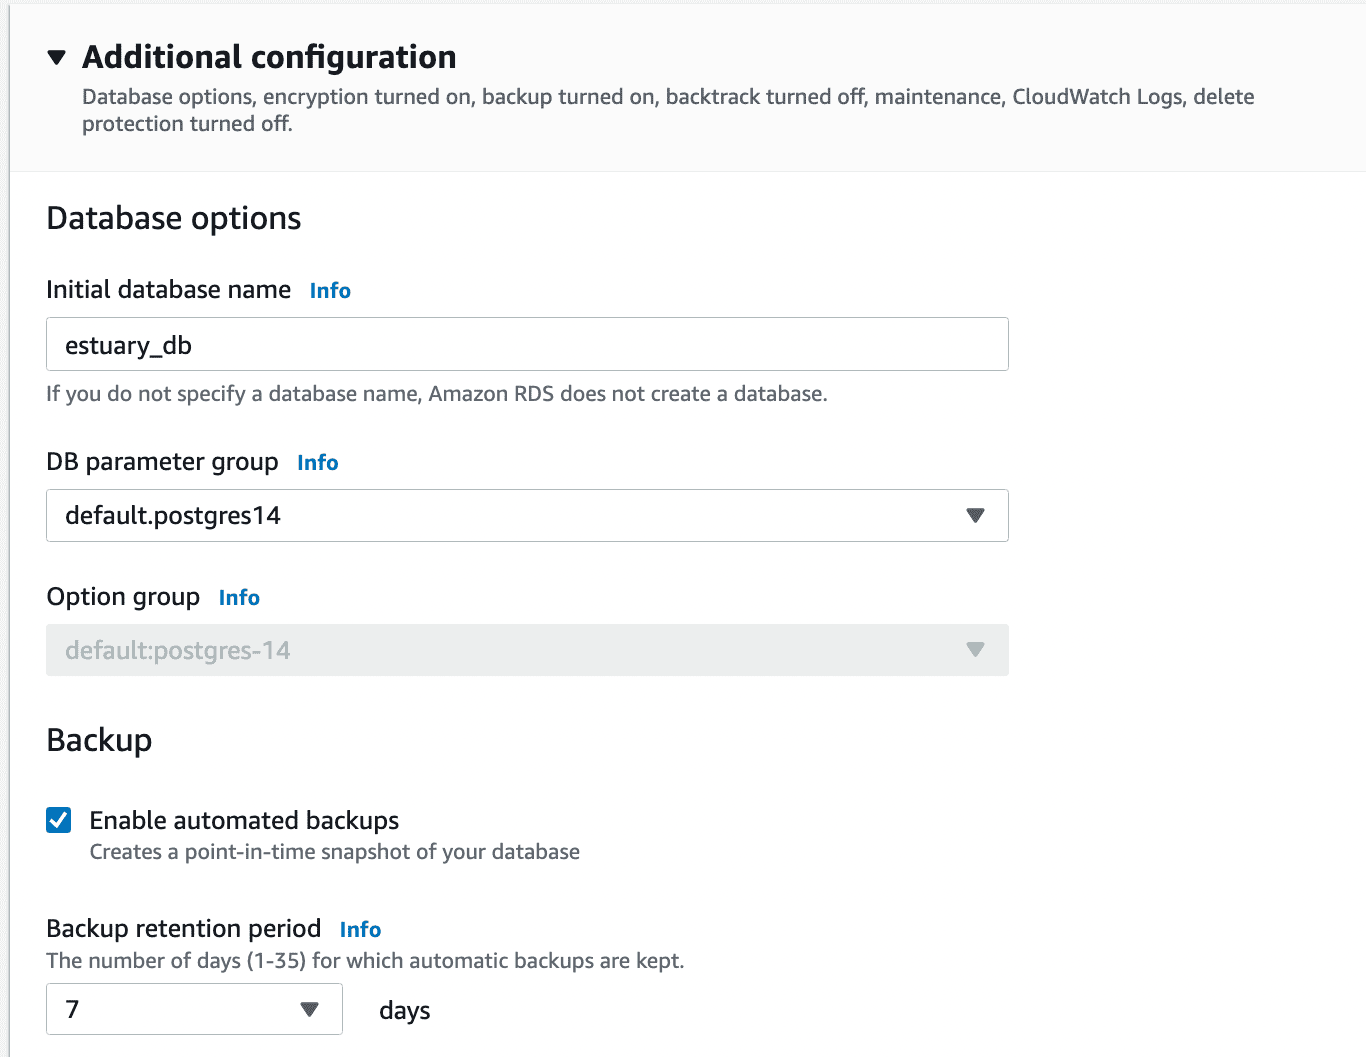
The next step is to configure your remote Postgres database.
As shown in the images above, configure a Postgres database instance remotely with:
- The username estuary_username
- Public access enabled
- Database name set to estuary_db
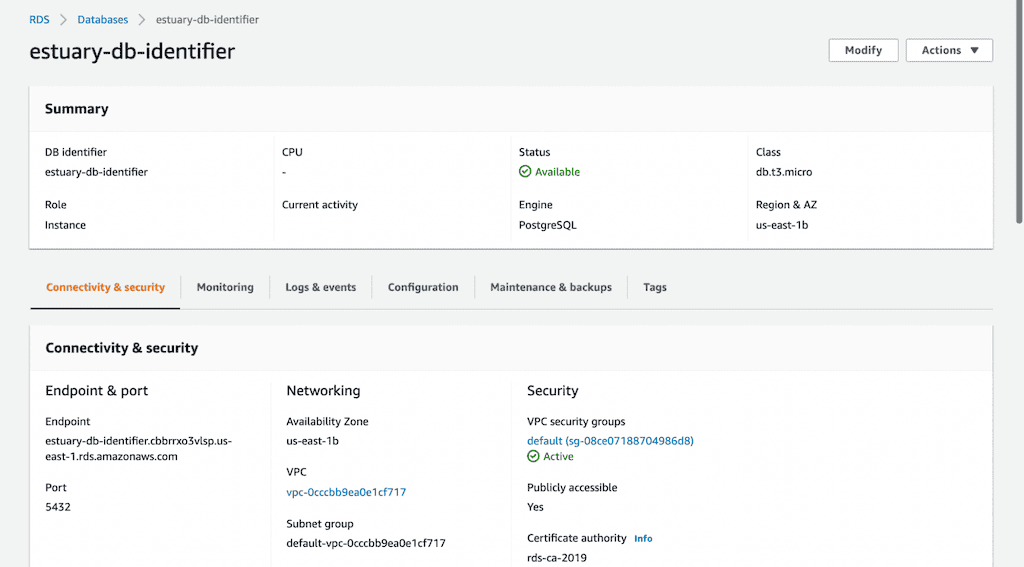
With your configurations set, you then proceed to create the database. This may take some time because RDS needs to allocate compute resources.
After the database finishes creating, you can see the endpoints which you can use to connect to your local Postgres database.
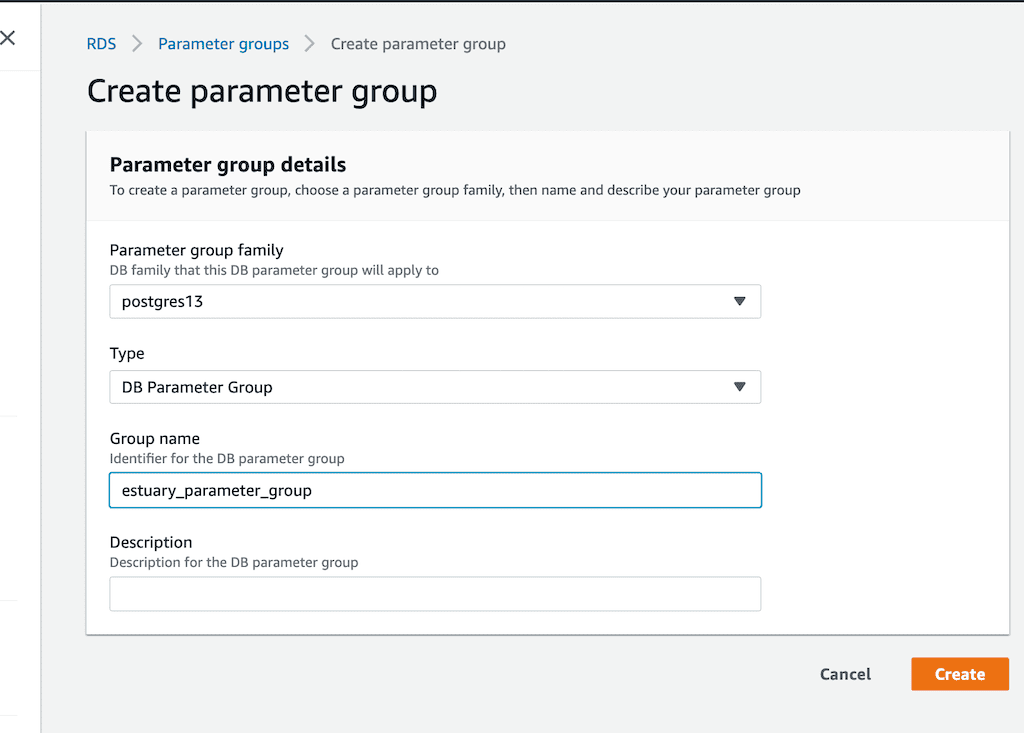
Next, you need to create a parameter group and associate it with your database. A parameter group is a set of configurations that you can set for your database.
Navigate to RDS >> Parameter group. Name the parameter group estuary_parameter_group.
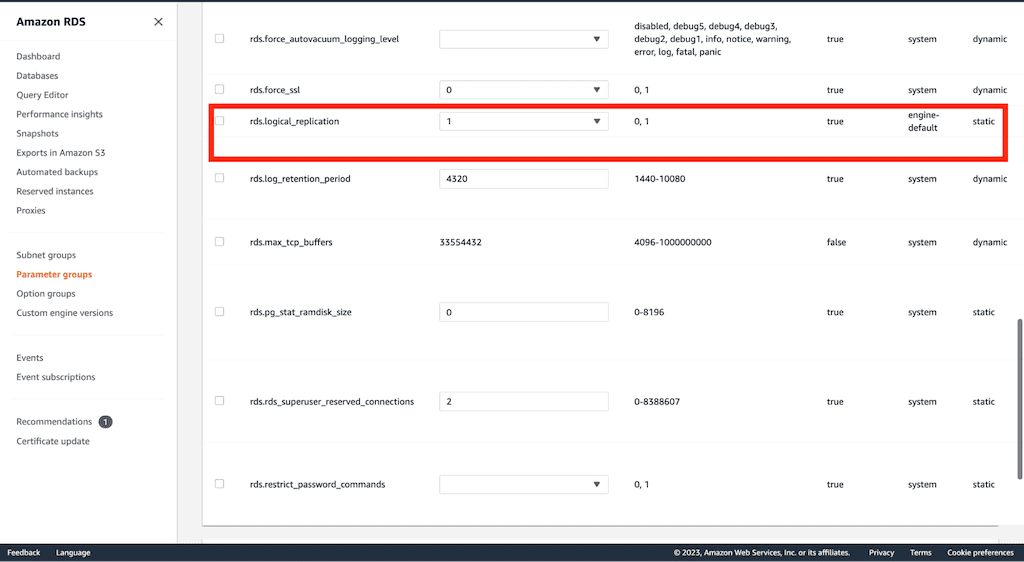
After creating a parameter group, you have to configure it. To use with Flow, the only configuration you need to do is to enable logical replication. This will allow data streaming using change data capture.
Edit your parameter group and set rds.logical_replication=1.
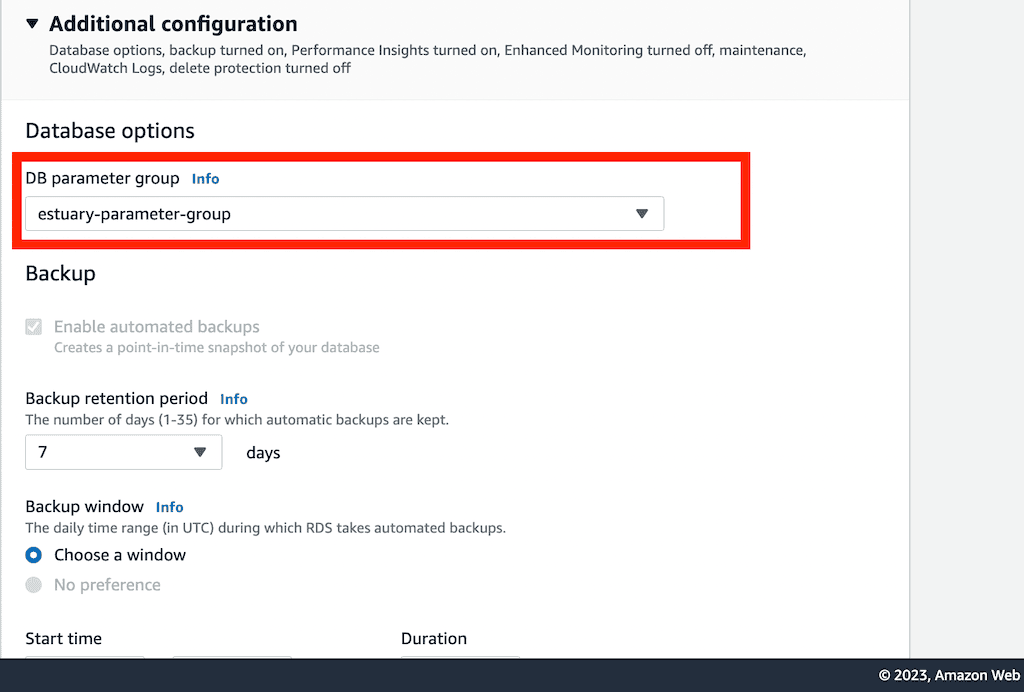
- Associate the parameter group with the database
Go to RDS>>Databases>>Modify.
Under the Additional configuration setting, change the DB parameter group from default to estuary-parameter-group.
Reboot your database and continue.
Step 3: Set up Postgres Client Locally to Complete Postgres Setup
After signing up for Estuary Flow and creating your remote RDS instance, you’ll need to run a few queries to complete the database setup. To do that, you must first install the Postgres client locally from here.
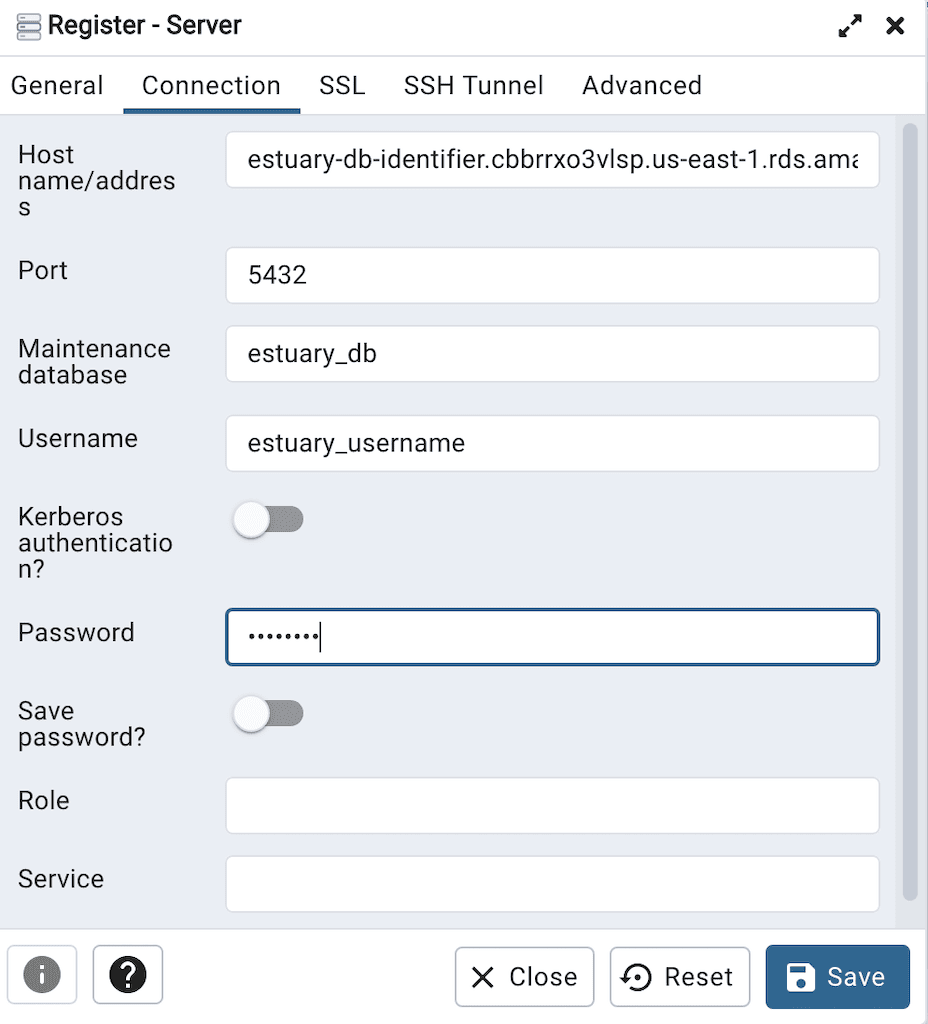
Once the client is installed, you can connect to your remote RDS instance. Open the Postgres client and register a new server.
In the Connection tab, you specify your database:
- Hostname
- Port number
- Username
- Database name
- Password
These are the same parameters you configured when you created your remote Amazon RDS database instance. When all the parameters have been entered, you should be able to successfully connect your local Postgres client to the remote Postgres database instance.
Step 4: Create a table and populate it
Now, let’s populate the database with some sample data.
In this example we will build a sample monitoring system that monitors real-time changes in temperature values from various data sources. For this tutorial, the data used can be found here.
You can create a schema and table by executing the code block on your Postgres query editor or psql terminal.
plaintextcreate schema iot_schema;
create table iot_schema.iot_table(
id varchar(100) PRIMARY KEY,
room_id varchar(100),
noted_date varchar(100),
temp integer,
"out/in" varchar(50)
);
To populate the table with data, execute the code below.
plaintext\copy iot_schema.iot_table(select temp_id,room_id,noted_date,temp,’out/in’) FROM '/path-to-file/IOT-temp.csv' with (format csv, header true, delimiter ',');
\copy iot_schema.iot_table FROM '{path_to_csv_file}' with (format csv, header true, delimiter ',');
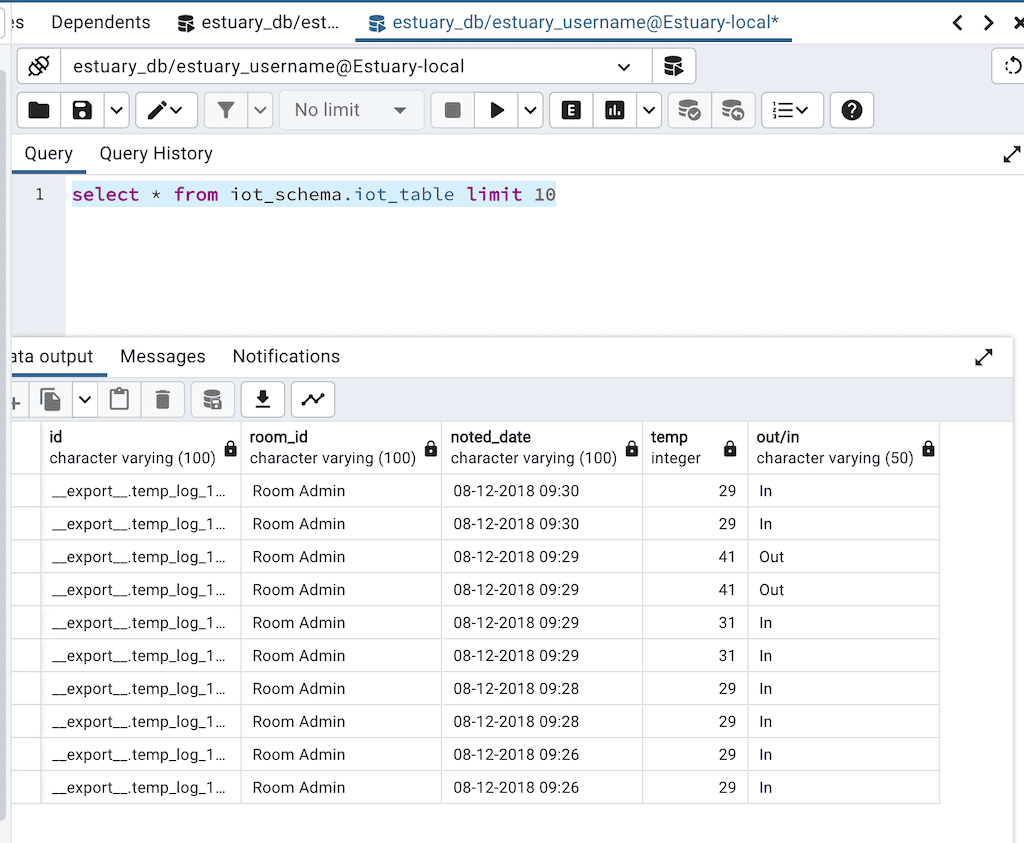
After executing this command, the data will be successfully loaded into your Postgres table. You can confirm by extracting the first ten records.
plaintextselect * from iot_schema.iot_table limit 10The output of this query is shown in the image below.
You can also get the total records in the table by executing the command:
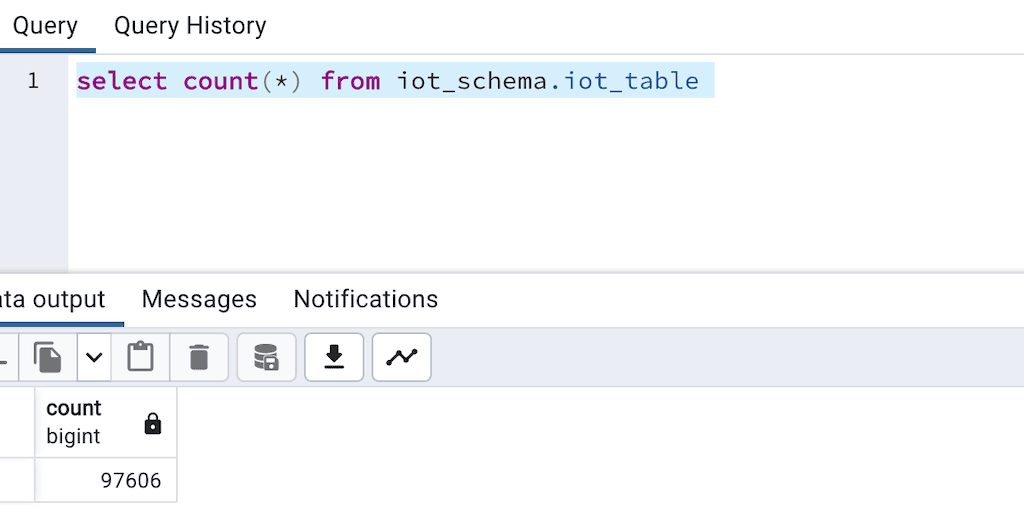
plaintextselect count(*) from iot_schema.iot_table
The output shows that there are 97,606 records in our table. Now, you want to stream all these records to your Snowflake destination for real-time analysis.
Step 5: Set up Snowflake
- Create a Snowflake database and schema
If you are new to Snowflake, follow Snowflake’s guide to get started. On the Snowflake classic console, you can create a Snowflake database by running the command:
plaintextcreate database estuary_snowflake_dbYou can also create a schema in Snowflake by running the command:
plaintextuse "ESTUARY_SNOWFLAKE_DB";
create schema estuary_snowflake_schema;
You can get your Snowflake account name by executing the command:
plaintextSELECT current_account();You also need to create a user for Estuary and grant the user data warehouse permissions. You can do that by executing the block of code below.
plaintextset estuary_role = 'ESTUARY_ROLE';
set estuary_user = 'ESTUARY_USER';
set estuary_password = 'password';
create database if not exists identifier($database_name);
use database identifier($database_name);
create schema if not exists identifier($estuary_schema);
create role if not exists identifier($estuary_role);
grant role identifier($estuary_role) to role SYSADMIN;
create user if not exists identifier($estuary_user)
password = $estuary_password
default_role = $estuary_role;
grant role identifier($estuary_role) to user identifier($estuary_user);
grant all on schema estuary_snowflake_schema to identifier($estuary_role);
grant USAGE on warehouse estuary_wh to role identifier($estuary_role);
-- grant Estuary access to database
grant CREATE SCHEMA, MONITOR, USAGE on database estuary_snowflake_db to role identifier($estuary_role);
-- change role to ACCOUNTADMIN for STORAGE INTEGRATION support to Estuary (only needed for Snowflake on GCP)
use role ACCOUNTADMIN;
grant CREATE INTEGRATION on account to role identifier($estuary_role);
use identifier($estuary_role);
COMMIT;
Step 6: Create a Capture
In the previous section, you created an Amazon RDS instance and a Snowflake destination. If you already had your Postgres and Snowflake instances, you would not have needed to perform these steps.
The next step is to create a capture in Estuary.
Before creating a capture, you need to grant Estuary Flow the necessary permissions. This includes creating an account for Estuary, and a single table flow_watermarks. Estuary writes a watermark into the table to track its read position in the Postgres write-ahead log (WAL).
You can achieve this by running the code below in your Postgres query editor.
plaintextCREATE USER flow_capture WITH PASSWORD ‘password’;
GRANT rds_replication TO flow_capture;
GRANT SELECT ON ALL TABLES IN SCHEMA iot_schema TO flow_capture;
GRANT ALL ON ALL TABLES IN SCHEMA iot_schema TO flow_capture;
ALTER DEFAULT PRIVILEGES IN SCHEMA iot_schema GRANT SELECT ON TABLES TO flow_capture;
GRANT USAGE ON SCHEMA iot_schema TO flow_capture ;
CREATE TABLE IF NOT EXISTS public.flow_watermarks (slot TEXT PRIMARY KEY, watermark TEXT);
GRANT ALL PRIVILEGES ON TABLE public.flow_watermarks TO flow_capture;
GRANT ALL PRIVILEGES ON TABLE iot_schema.iot_table TO flow_capture;
CREATE PUBLICATION flow_publication FOR ALL TABLES;
You can now create a capture by clicking on New Capture.
After clicking on New Capture, you then select your source. In this case, your source connector is Postgres.
- Create a capture in Estuary Flow, specifying source details
When you create a capture, specify your:
- Capture name
- Server address
- Username
- Database password
- Database name
These configurations were set when you created your Amazon RDS instance in the previous section.
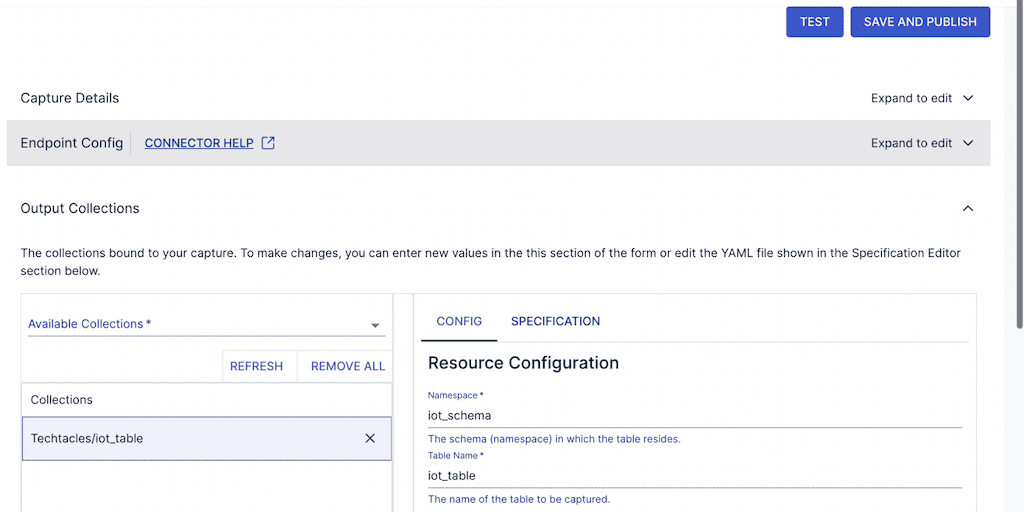
When you click on NEXT, you will see the tables and schema you also created in the previous section.
You can now save and publish the capture.
Estuary Flow will then start to read the WAL and also start to execute an incremental snapshot of the database in parallel. Estuary Flow is the only product that does both in real-time and in parallel. As it reads both, Estuary Flow combines this into a stream with exactly-once guaranteed delivery that it also commits as a durable append-only log called a collection. A collection allows you to replay and reuse the stream at any time as a stream or batch load.
The next step is to load this data into Snowflake.
Step 7: Create a Materialization
To load data into Snowflake you create a materialization. Navigate to the Materialization tab in the Flow UI and click on Materialization.
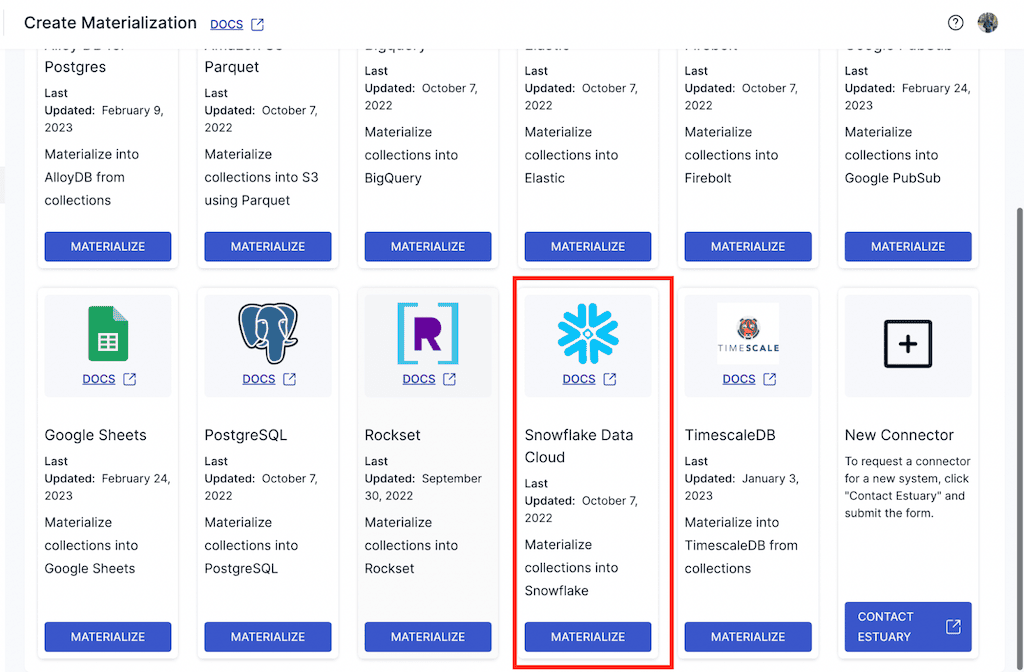
You then specify your destination. The destination in this case is Snowflake data cloud. You can find it by typing Snowflake into the search field.
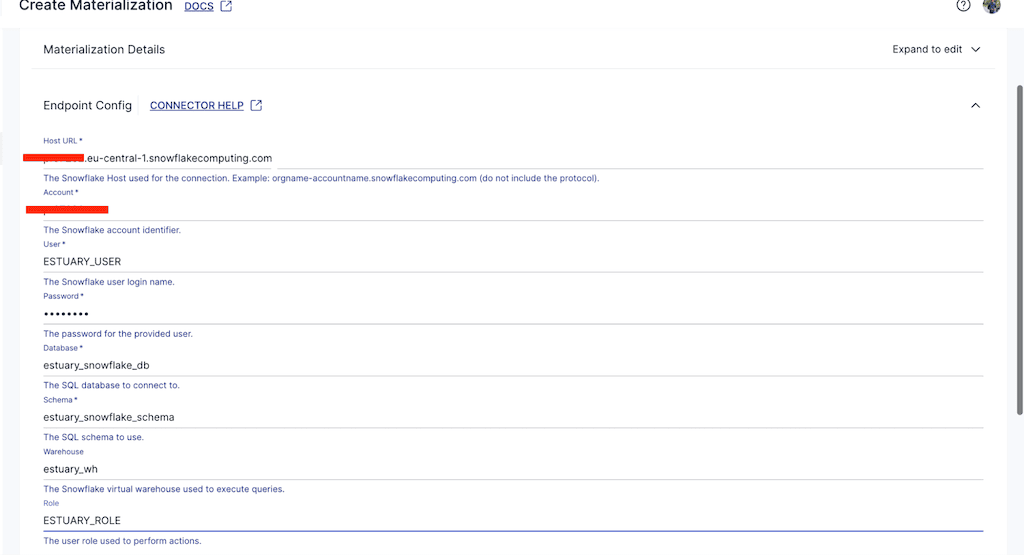
When you select your destination, you will have to configure it by specifying the:
- Host URL
- Snowflake database name
- Warehouse name
- Account name
- Password
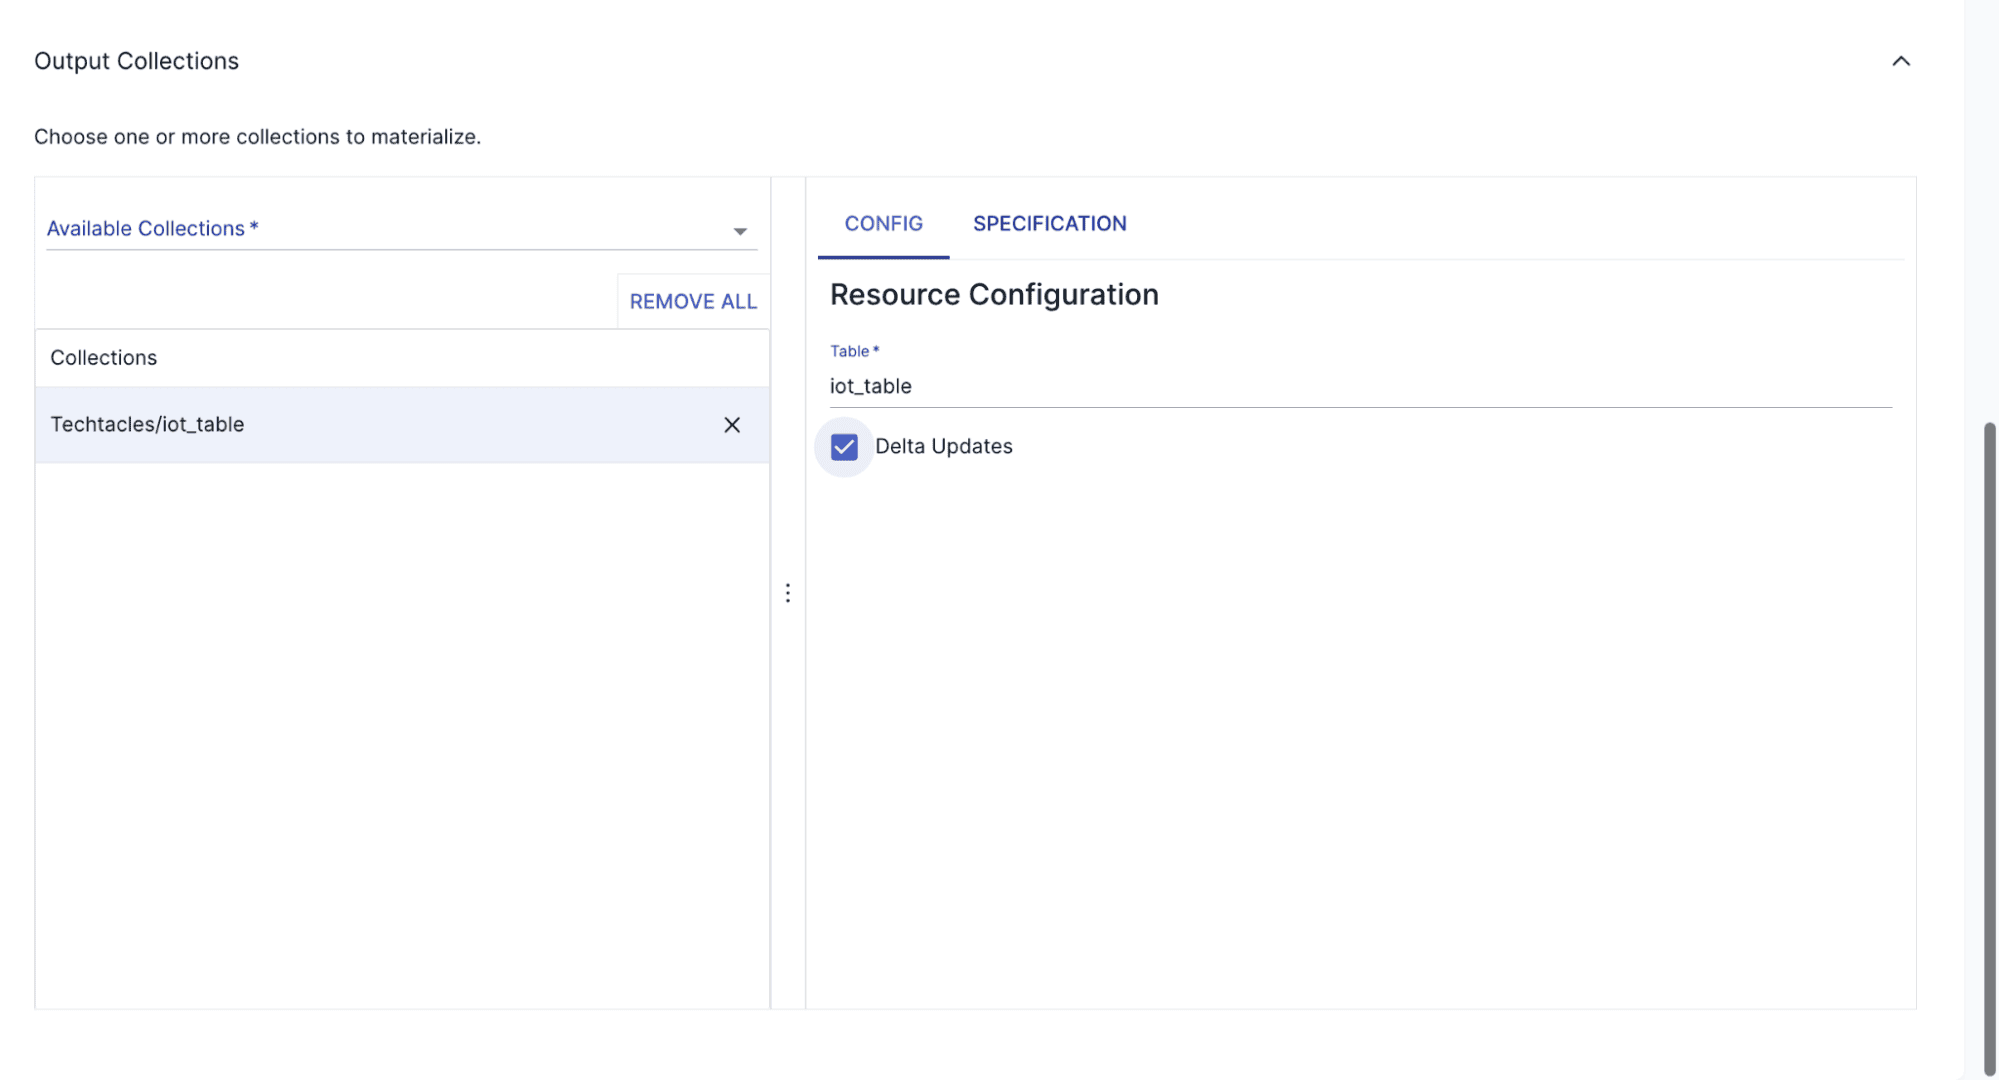
You will also have to specify your collection representing the iot data captured from Postgres.
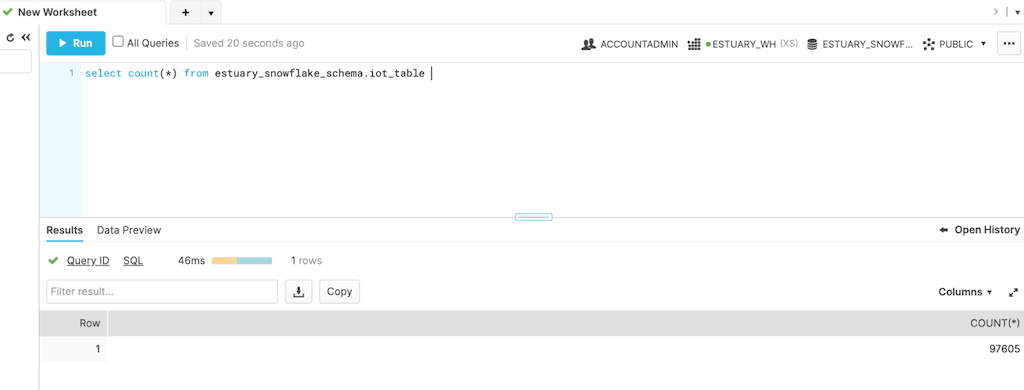
When you enable the materialization, you will notice that data gets streamed from your source to your destination. Let’s take a look at the number of records that landed in the destination.
From the image above, you notice that all the data got streamed from Postgres to Snowflake.
Step 8: Confirm the Data in Snowflake is Accurate
In this section, you will append new data to your Postgres source and verify the results in your Snowflake destination.
In your Postgres local server, you can run the command:
plaintextinsert into iot_schema.iot_table values ('__export__new_id_28282',
'Room admin','2023-02-01',67,'IN')
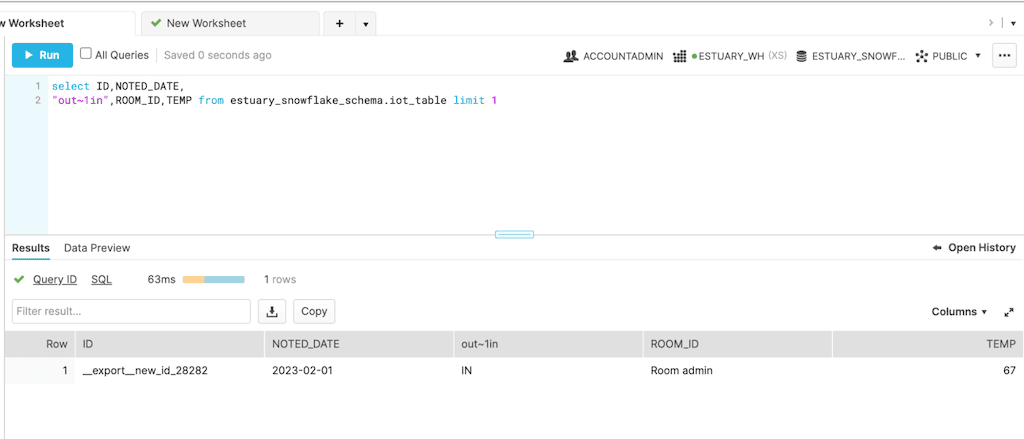
This will insert a new record to your Postgres database. You can verify this stream in your Snowflake data warehouse by executing the command
You can see the results of your stream inserted in your Snowflake destination. You can see that Estuary Flow does this with very minimal latency.
Summary: Estuary Flow Benefits and Challenges
One major benefit of Estuary Flow should be clear after this tutorial. It only takes minutes to learn and use Estuary Flow to build data pipelines.
Another benefit is that Estuary Flow supports mixing real-time and batch data movement. While CDC should always be real-time to minimize the load on the source database, Estuary Flow has other source connectors that allow batch, and even with CDC, you can load destinations, such as Snowflake in this example, in real-time or batch.
Third, Estuary Flow is very reliable, in part because it stores data as it moves it, which not only ensures recoverability but lets you reuse data at any time for later backfilling, stream processing, or time travel.
Fourth, Estuary Flow is one of the lowest cost offerings on the market. For more you can visit the pricing page and use the pricing calculator to determine your cost.
Looking to replicate your success with PostgreSQL to BigQuery? Check out our comprehensive guide on seamlessly moving data from PostgreSQL to BigQuery.
Conclusion
Hopefully you’ve learned a few ways to load data from Postgres to Snowflake and figured out which method is best for your needs.
While Airflow works well if you only need batch and want to, or need to build your own data pipeline, tools like Estuary Flow make it possible to build data pipelines in minutes. In addition, with Estuary Flow it is now possible to build both real-time and batch data movement.
Ready to simplify your Postgres to Snowflake data pipeline? Try Estuary Flow for free and start moving your data in minutes.
FAQs
- What are my options for real-time data movement?
Estuary Flow and Debezium are the two main options. Debezium is only for CDC and as open source will require you to set it up, maintain and support it on your own. With Estuary Flow you’re up in minutes and can mix CDC with other real-time or batch connections.
- What are the risks of using CDC with Postgres?
A. If CDC is set up properly, it is the most reliable and lowest-load method for moving data from Postgres. You do need to work with your administrator to configure Postgres properly. You also should use real-time CDC, and not read the WAL in batch intervals.
- Why do I need to provide write access to a CDC connector?
A. If a CDC connection fails for any reason, both the Postgres connection and the remote client should keep track of the position where the WAL was last read. The most reliable way to do that in Postgres is to use Postgres to track the offset as a database write.


